In this Areopa Academy webinar, Microsoft MVP Dmitry Katson walks through the full process of building a professional documentation portal from scratch — going from an empty GitHub repository to a publicly hosted site in a single session. Dmitry built the docs portal for his CentralQ Chat app in under 48 hours after publishing to AppSource, and shares the exact workflow, tools, and configuration that made it possible. Moderator David Singleton facilitates the session and a Q&A at the end.
Why Documentation Matters for AppSource Apps
Dmitry opens by making the case that documentation has gone from a nice-to-have to a fundamental requirement for Business Central apps. In the NAV era, developers could get away with minimal documentation — but in the AppSource SaaS world, good docs directly reduce support overhead, enable self-service onboarding, and improve app ratings.
He also highlights a point that has become increasingly relevant: documentation now needs to be written for both humans and AI. Copilot and similar assistants need to find and read your documentation before they can answer user questions about your app. If your docs don’t exist or are poor quality, neither search engines nor AI models will surface your product effectively.
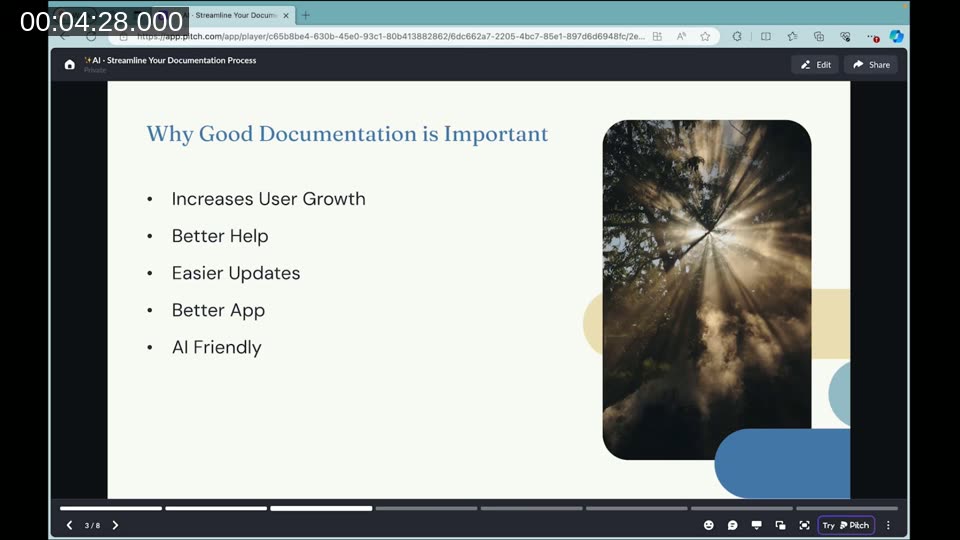
After reviewing around 5,000 apps on AppSource, Dmitry found that very few have documentation worth reading. Many upload marketing materials instead of actual usage instructions. This is the problem he set out to solve — and MkDocs is the tool he landed on.
📖 Docs: Getting Started — MkDocs — Official guide covering installation, project creation, and themkdocs serve/mkdocs buildworkflow.
A Look at the CentralQ Chat Documentation Portal
Before diving into setup, Dmitry shows the finished documentation portal he built for CentralQ Chat at docs.katson.com. The site features a left-side navigation panel with nested sections, a table of contents for each page, embedded Vimeo videos, code blocks, and a search bar — all rendered from plain Markdown files stored in a GitHub repository.
The entire site structure is controlled through a mkdocs.yml configuration file. Navigation is declared as a YAML hierarchy mapping page titles to Markdown file paths — no HTML or templating required.
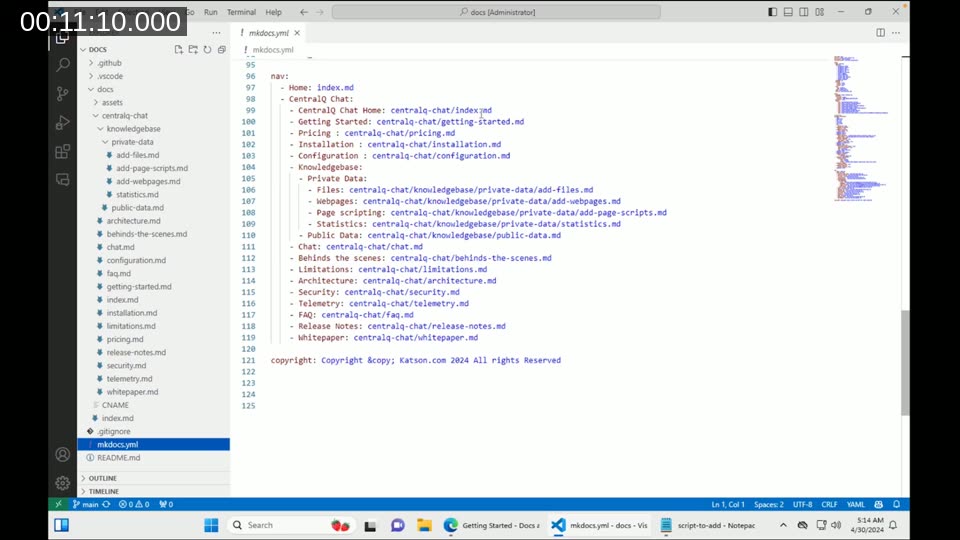
One workflow Dmitry highlights is using his app’s own page scripting feature to generate user instructions, then exporting them to Markdown and committing them directly into the docs repo. The GitHub Actions pipeline picks up the push and republishes the site automatically within about two minutes.
Prerequisites: Python, Git, and VS Code
MkDocs is a Python package, so Python is required even though you won’t write any Python code. Dmitry walks through the installation steps:
- Download and install Python from python.org. During installation, check the Add Python to PATH option — this is easy to miss and will cause problems later if skipped. Also click “Disable path length limit” at the end of the installer on Windows.
- Install Git for version control and pushing changes to GitHub.
- Use Visual Studio Code as the editor. Dmitry also enables GitHub Copilot for Markdown files in VS Code settings, since it’s disabled by default (
"markdown": false→"markdown": true).
Creating a New Project: From Zero to Running Locally
Dmitry creates a new public GitHub repository, clones it locally in VS Code, and then runs two commands in the integrated terminal:
# Install MkDocs and the Material theme
pip install mkdocs
pip install mkdocs-material
# Create a new MkDocs project in the current directory
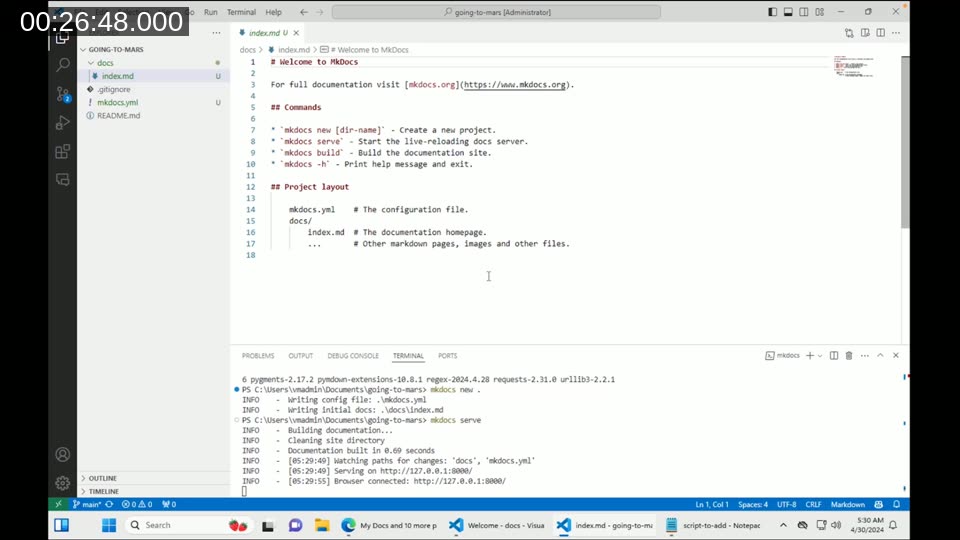
mkdocs new .
# Start the local dev server
mkdocs serve
Running mkdocs new . generates a minimal project structure: a docs/ folder with an index.md homepage and an mkdocs.yml configuration file. The mkdocs serve command starts a local server at http://127.0.0.1:8000/ with live reload — any file save is immediately reflected in the browser.
📖 Docs: Installation — Material for MkDocs — Step-by-step guide for installing the Material theme and setting up a new project.
Configuring the Site with mkdocs.yml
Most of the session focuses on configuring mkdocs.yml. Dmitry copies settings from his production CentralQ Chat docs configuration and walks through each section:
Theme and visual settings:
theme:
  name: material
  palette:
    scheme: slate        # dark mode
  font:
    text: Urbanist
    code: Roboto Mono
  logo: assets/logo.svg
  favicon: assets/favicon.png
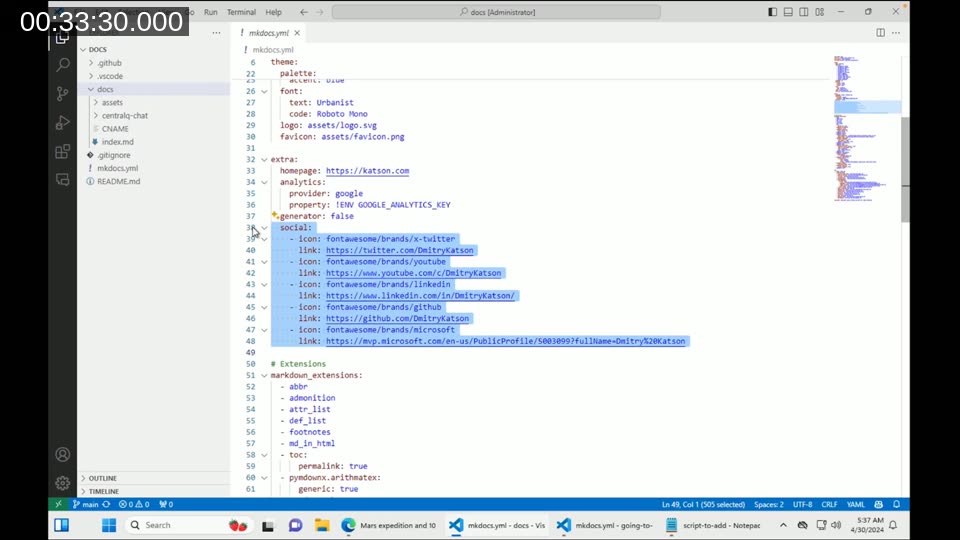
Extra configuration — homepage link, Google Analytics, and social footer icons (Twitter, YouTube, LinkedIn, GitHub, Microsoft MVP profile):
extra:
  homepage: https://katson.com
  social:
    - icon: fontawesome/brands/x-twitter
      link: https://twitter.com/DmitryKatson
    - icon: fontawesome/brands/youtube
      link: https://www.youtube.com/c/DmitryKatson
Markdown extensions for code highlighting, admonitions (note/warning/info blocks), task lists, and more:
markdown_extensions:
  - pymdownx.highlight:
      anchor_linenums: true
  - pymdownx.superfences:
      custom_fences:
        - name: mermaid
          class: mermaid
  - pymdownx.tasklist:
      custom_checkbox: true
  - admonition
  - footnotes
Dmitry notes that YAML indentation is critical — pasting configuration in the wrong place will silently break things. He also demonstrates enabling MkDocs Material features such as content.code.copy (adds a copy-to-clipboard button on all code blocks) and navigation tabs.
📖 Docs: Reference — Material for MkDocs — Complete reference for all supported Markdown extensions, admonitions, code blocks, icons, and other content formatting options.
Using ChatGPT to Generate Markdown Content
While MkDocs packages are installing in the terminal, Dmitry opens ChatGPT and prompts it to generate a structured guide in Markdown format. The prompt is simple: write a guide about going to Mars using MkDocs Material formatting, keep it short. ChatGPT returns well-structured Markdown with headers, bullet points, and bold text — ready to paste directly into a .md file.
He also shows GitHub Copilot completing AL code snippets inline inside Markdown code blocks. Once Copilot is enabled for Markdown files in VS Code settings, it works the same way as in any other file type. The combination of ChatGPT for initial content generation and Copilot for in-editor assistance significantly reduces the time spent writing documentation from scratch.
Structuring the Site with the nav Section
To add pages beyond the homepage, Dmitry adds a nav section to mkdocs.yml:
nav:
  - Home: index.md
  - Getting Started with Mars: getting-started.md
Each entry maps a display label to a Markdown file path under the docs/ directory. Nested sections are expressed as YAML lists under a parent key, which creates collapsible navigation groups in the sidebar. MkDocs watches for file changes and validates that every file referenced in nav actually exists — it logs a warning if a referenced file is missing.
Publishing to GitHub Pages with CI/CD
To publish the site, Dmitry adds two files to the repository:
1. GitHub Actions workflow at .github/workflows/ci.yml — taken directly from the MkDocs Material documentation. This workflow triggers on every push to the main branch, installs mkdocs-material, and runs mkdocs gh-deploy to push the built site to the gh-pages branch:
name: ci
on:
  push:
    branches:
      - main
permissions:
  contents: write
jobs:
  deploy:
    runs-on: ubuntu-latest
    steps:
      - uses: actions/checkout@v4
      - uses: actions/setup-python@v5
        with:
          python-version: 3.x
      - run: pip install mkdocs-material
      - run: mkdocs gh-deploy --force
2. CNAME file in the repository root — contains the custom subdomain (e.g., demos.katson.com). This tells GitHub Pages to serve the site under that domain. A corresponding CNAME DNS record pointing to katson-com.github.io is required at the DNS provider.
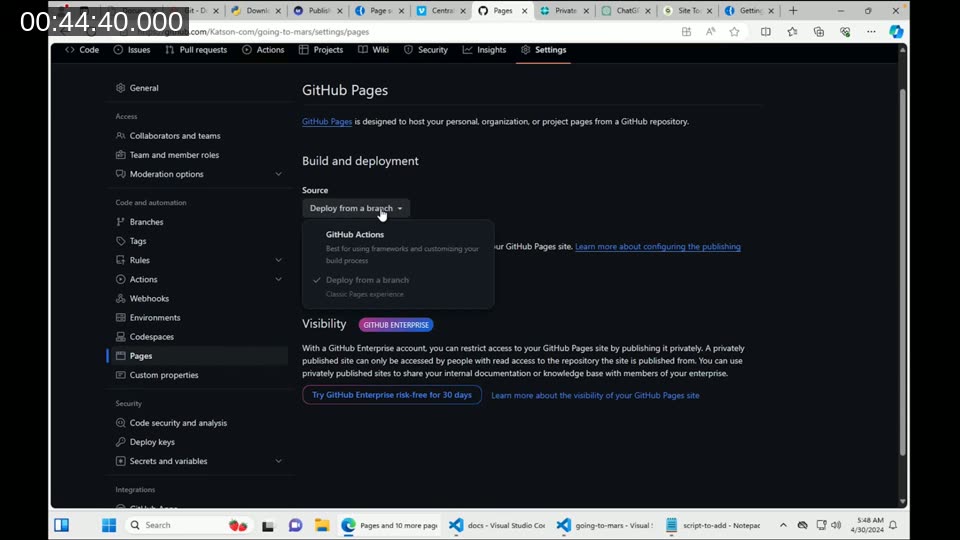 Pages screen showing the deployment source dropdown with GitHub Actions selected” />
After committing and pushing both files, the Actions tab shows the workflow queuing and completing in about 30 seconds. GitHub Pages picks up the custom domain from the CNAME file and verifies the DNS configuration automatically.

📖 Docs: Publishing your site — Material for MkDocs — The exact GitHub Actions workflow YAML used in this webinar, along with configuration for other CI providers.
End-to-End Demo: From Edit to Live in Two Minutes
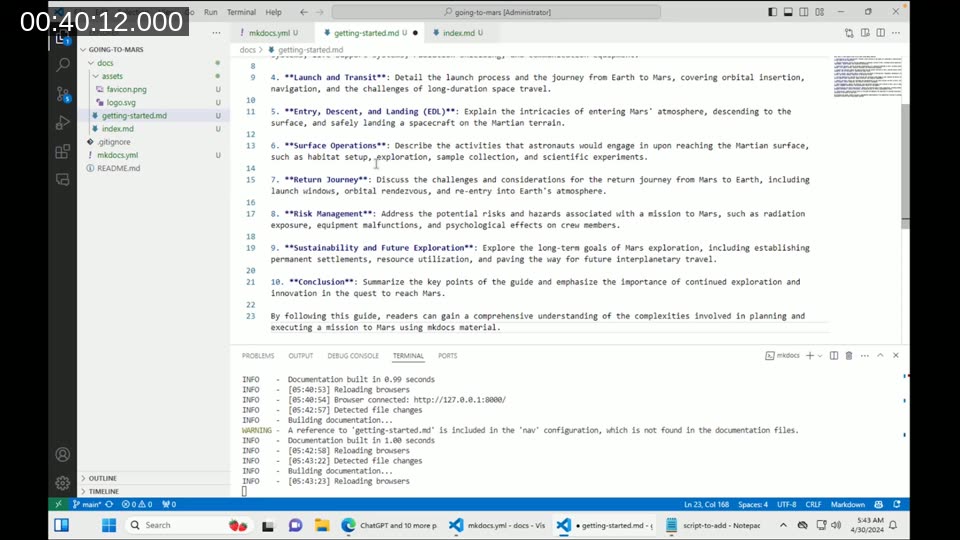
To close the demo, Dmitry makes a small edit to the getting-started page in VS Code — adding an admonition block using the !!! info syntax — commits, and pushes. Within about two minutes, the change is live on the public domain. The full loop from local edit to publicly visible documentation takes less time than a typical Teams call.
Q&A: MkDocs vs. Docusaurus and Other Alternatives
The main question in the Q&A section came from an attendee asking why Dmitry chose MkDocs over alternatives like Docusaurus. His answer: simplicity. MkDocs lets you focus entirely on content — structure is handled through a single YAML file, there’s no JSX or React knowledge required, and the Material theme provides a polished look out of the box. He found other tools more complex to configure without a proportional benefit for his use case.
David Singleton added context from the moderator’s perspective: in the NAV era, documentation and testing were often cut from project budgets. In the BC subscription model, that’s no longer viable — support calls that can’t be billed need to be eliminated, and good documentation is one of the most cost-effective ways to do that.
This post was drafted with AI assistance based on the webinar transcript and video content.