
This was the 27th Areopa webinar of 2020, and the final one of the year, moderated as always by Luc van Vugt. Josh Anglesea, a pre-sales consultant at Xpedition in the UK, returns after an earlier session on Power Automate to cover the part he didn’t get to the first time around: building a custom connector in Power Platform so Power Apps and Power Automate can work directly with Business Central data.
Why build a custom connector
Josh opens by pointing out a limitation of the standard Business Central connector, shared between Power Apps and Power Automate: it only exposes a fairly small, fixed set of tables. Since Business Central is an extensible product, teams building on top of custom tables — or on data the standard connector simply doesn’t cover — need another way in. A custom connector, wrapped around a Business Central API page, fills that gap.
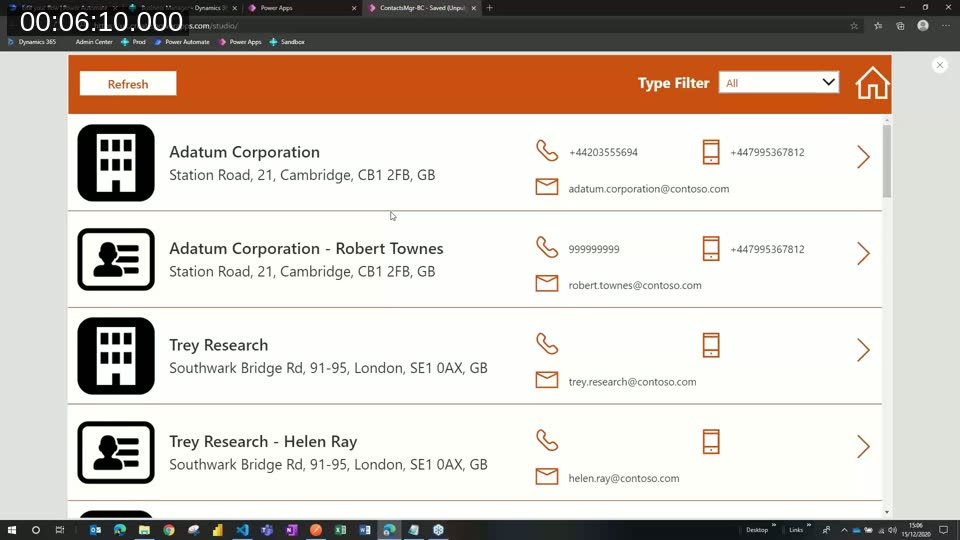
To show why it’s worth the effort, Josh demos a small Power App that lists contact data pulled entirely through a custom connector, with working refresh and update buttons both calling the same underlying API page.
The API page behind the connector
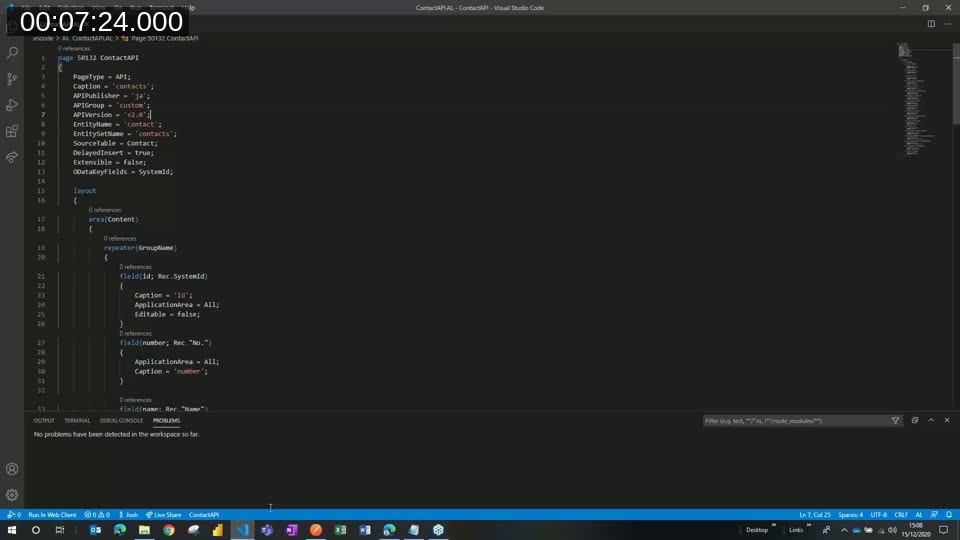
Everything starts with a custom API page in AL. Josh shows the page definition for the contact entity he’s exposing, published into the environment as a normal extension. Key properties define how the endpoint is addressed and shaped:
APIPublisher,APIGroup, andAPIVersion— form part of the custom API’s URL segmentEntityNameandEntitySetName— the singular and plural names used in the endpoint URLSourceTable— the table the page is built on (Contact, in this case)ODataKeyFields = SystemId— tells the API which field uniquely identifies a record, used later when addressing a specific contact for updates
Before touching Power Platform at all, Josh stresses testing the endpoint directly — with Postman or the REST Client extension for VS Code — to confirm it returns valid, well-formed JSON. Skipping this step just moves the debugging into the connector wizard later, where it’s harder to isolate.
📖 Docs: APIPublisher Property — Business Central — reference for the property (and its related APIGroup, APIVersion, and EntityName properties) used to shape a custom API page’s URL.
Starting the connector from blank
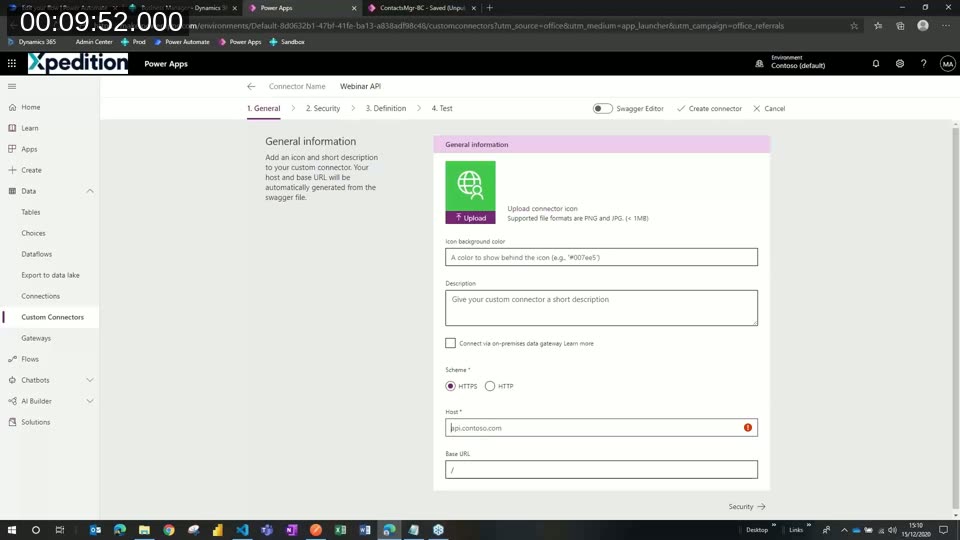
With the endpoint validated, Josh switches to the custom connector wizard in Power Apps (shared with Power Automate). Rather than importing an OpenAPI definition, he builds the connector from blank so every step is visible. The General section only needs a scheme (HTTPS), a host, and — deliberately left blank here — a base URL, since the full path will be defined per action instead.
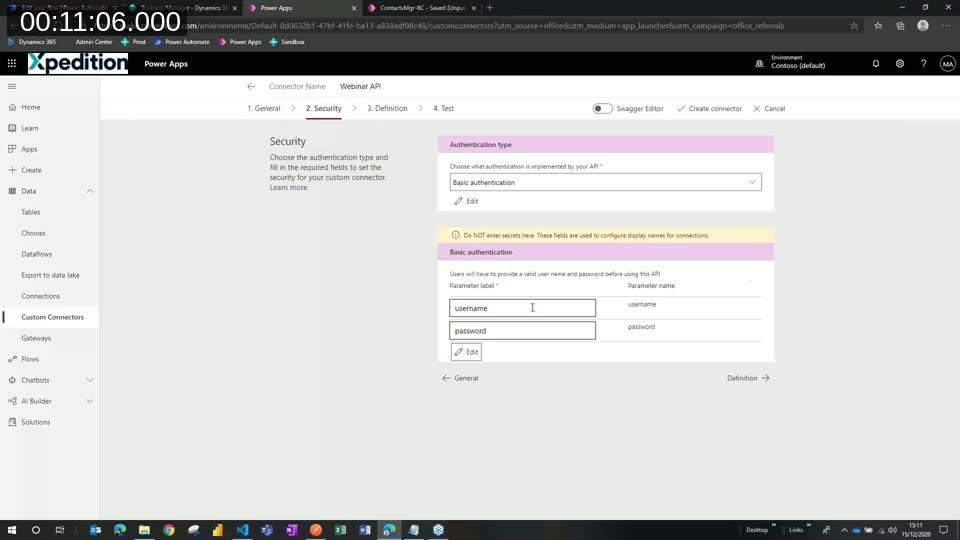
On the Security tab, Josh picks Basic authentication for the demo, noting that OAuth is the direction Business Central is moving toward but that Basic is still available and faster to set up for a webinar-length demo. The parameter labels here (username, password) are just what a user sees when they first create a connection — no actual secret values are entered on this screen.
📖 Docs: Custom connectors overview — Microsoft’s lifecycle summary for building, securing, describing, and sharing a custom connector, including the full list of supported authentication types.
Defining the GetContacts action
The Definition tab is where the connector’s actual behavior is laid out — one action per endpoint and verb. For the first action, Josh creates a GET operation and uses Import from sample, pasting in the same URL he already validated in Postman.
Two syntax details matter here: Postman uses double curly braces for variables ({{tenant}}), but the connector wizard expects single curly braces ({tenant}) to mark something as a user-supplied parameter. Josh keeps it to two parameters — tenant and company ID — which is enough to route the request to the right Business Central environment and company.
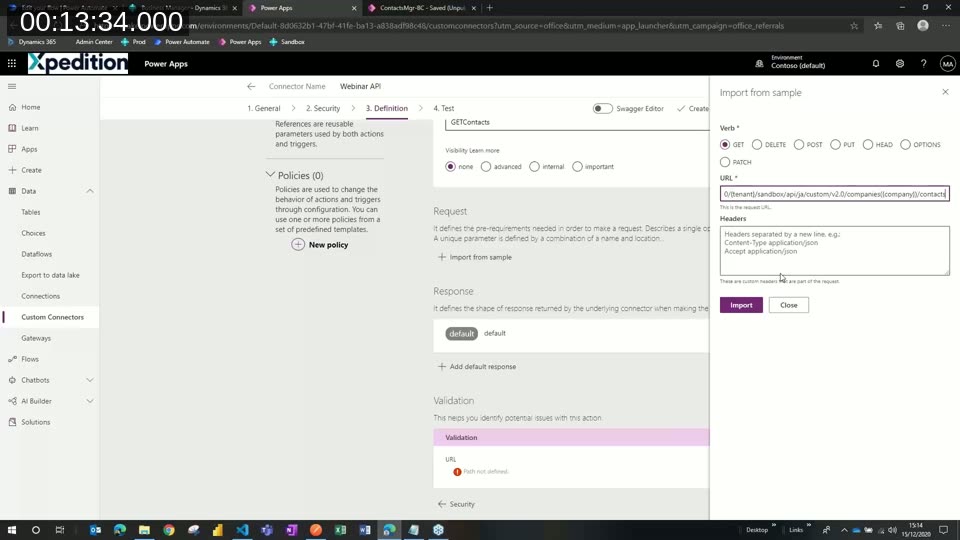
For the response, he pastes in the full JSON body returned by Postman — not just the inner value array, but the whole thing including the @odata.context wrapper. That matters: the connector needs to understand the actual shape of what the API returns (an array of contact objects inside a value property), even though later, inside a flow or app, only that inner array is usually the interesting part.
Defining the PatchContacts action
The second action follows the same pattern with a PATCH verb, but with a few differences specific to updating a record:
- The URL gets an extra parameter — the record’s
id— passed in regular brackets to address a specific contact, matching theODataKeyFields = SystemIdproperty set on the API page - An
If-Matchheader must be included, since OData requires it for update operations; a wildcard value (*) is acceptable, or a specific@odata.etagfor more precise concurrency handling - The request body only needs to contain the fields actually being changed, unlike the GET action’s full response shape
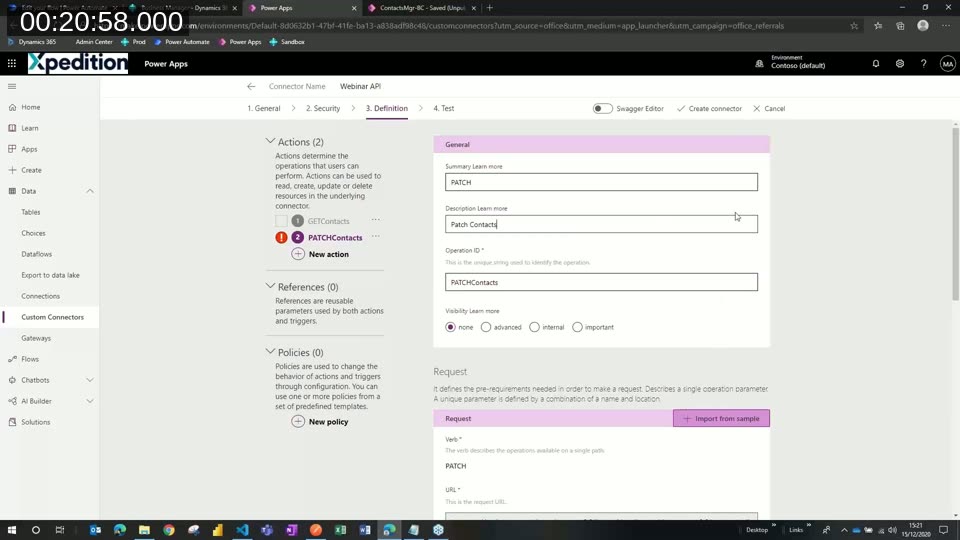
Josh also notes a current platform limitation: Business Central’s API surface supports GET, PATCH, POST, and DELETE, but not PUT — attempting to use PUT in the connector definition is rejected as unsupported at this point.
Testing the connector
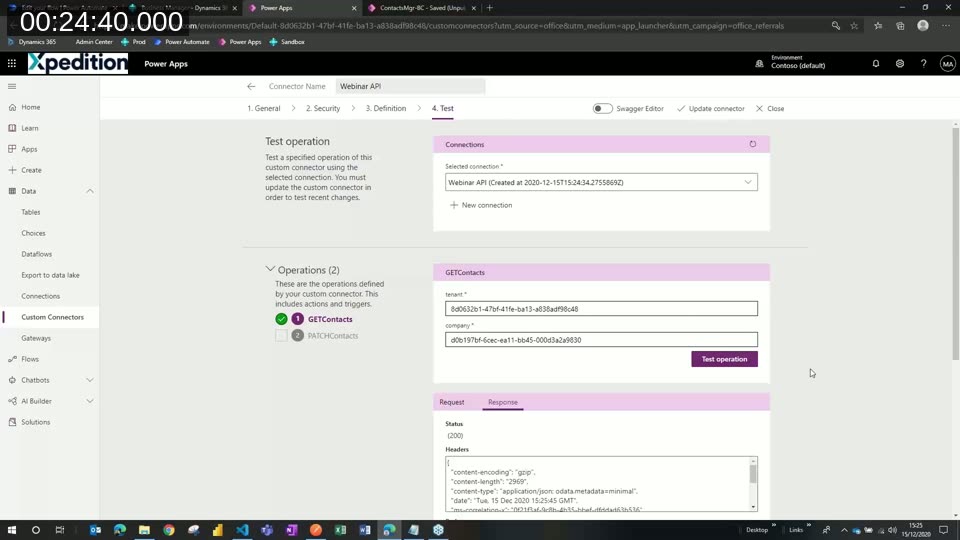
Once both actions are defined and the connector is created, the Test tab is where it gets exercised for real. Testing first requires establishing a connection — Power Platform stores this per user, the same way it does for the standard Business Central connector, so credentials aren’t re-entered on every call. Since the connector uses Basic authentication, that connection is created with a username and a Business Central web service access key generated from the user card.
With a connection in place, each action can be tested by supplying its parameters (tenant and company ID for the GET, plus the record ID and an address value for the PATCH). Both come back successful in the demo — a 200 response for the GET, and a confirmed update for the PATCH — after which Josh updates the connector to lock in the tested definition.
Using the connector in Power Apps
Back in the Power App, the custom connector shows up in the connector list once refreshed, and — being on the premium licensing tier, same as the standard Business Central connector — is added as a data source like any other. Josh wires up a button to run the GET action and store the result with ClearCollect, then walks through a detail he calls out specifically: unlike the standard connector, the custom connector’s response has to be unwrapped manually. Pulling the visible data into a gallery means reaching into the collection’s value property rather than binding directly to the top-level result.
From there, he builds a second screen for editing a selected contact, passing the record’s ID and current values through as page context, and wires a save button to the PATCH action — reproducing, end to end, the same update flow shown in the opening demo.
Using the connector in Power Automate
Switching to Power Automate, the same custom connector appears alongside any other custom connectors already in the environment when adding a new step to a flow. Josh builds a simple manually-triggered flow that passes in tenant and company values and calls the GET action.
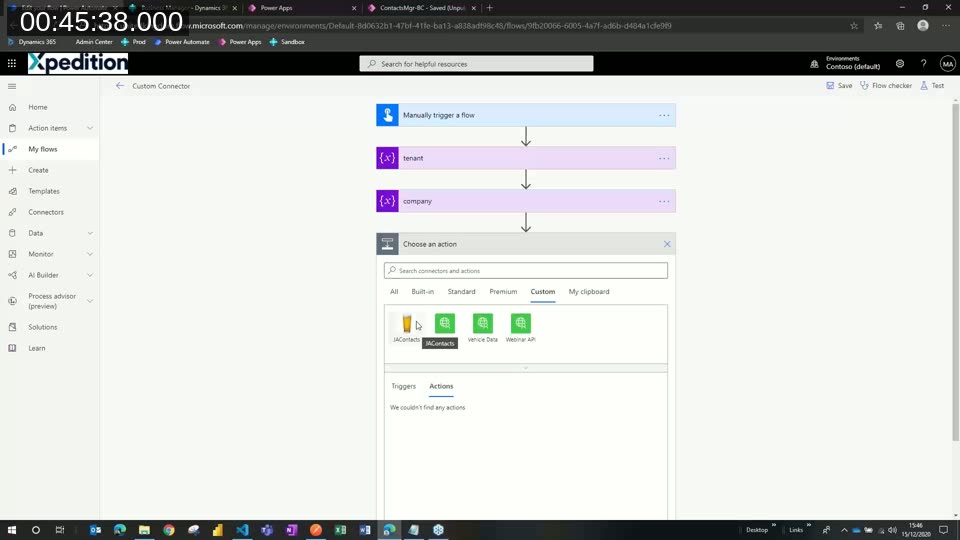
He deliberately works through a couple of live mistakes here, since they illustrate a real gotcha: feeding the connector’s raw JSON output into a Parse JSON action with the wrong schema (expecting an object where the API actually returns an array) produces a schema validation failure. The fix is the same lesson as in Power Apps — know exactly what shape the connector returns before wiring up downstream actions — and once corrected, the flow parses the response and passes individual fields into a further action, like composing an email.
Where to go next
Josh closes by scoping what wasn’t covered: triggers. Everything in this session works on-demand — pulling or pushing data when a user or flow explicitly calls the connector. Reacting to changes as they happen in Business Central is a different mechanism entirely, built on webhooks, and Josh flags it as a natural follow-up topic.
In the Q&A, Luc asks whether the same approach extends to other tables. Josh confirms it does: since API pages themselves can expose multiple entities or handle queries, a single custom connector can grow to cover as much of the data model as a project needs, action by action, as long as each write operation can identify its unique key field.
This post was drafted with AI assistance based on the webinar transcript and video content.