
In this Areopa Academy webinar, Tobias Fenster (COSMO CONSULT) shows how to calculate and compare Azure costs without the repetitive clicking that the Azure Pricing Calculator requires. Moderated by Luc van Vugt, the session covers the Azure Retail Prices API, a small command line tool Fenster built with Deno and TypeScript, and Power Query in Excel for turning the results into something you can actually analyze. It closes with a look at running the whole toolchain from a VS Code dev container.
The problem with comparing Azure cost scenarios manually
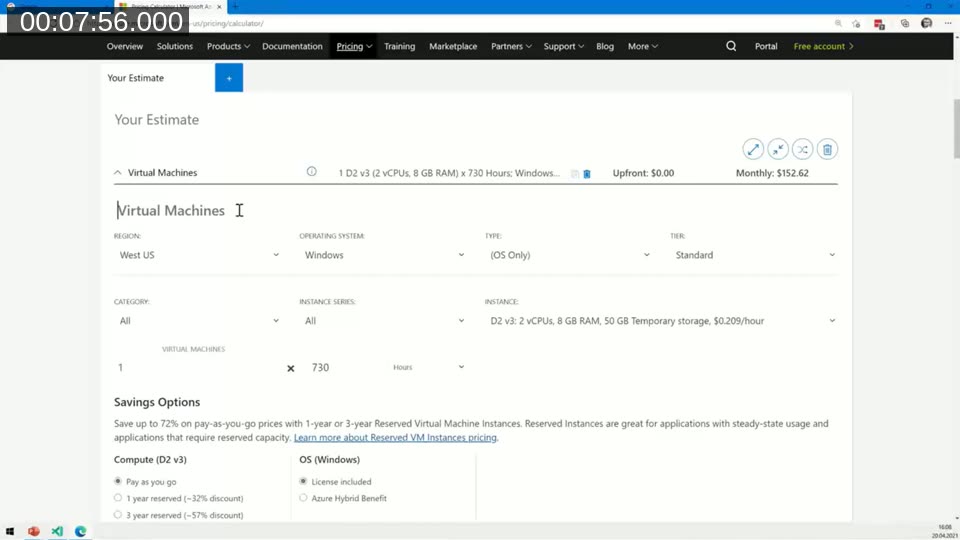
Business Central projects increasingly rely on Azure services, for development and test environments, production hosting, or product-specific components. Estimating the cost of those services usually starts with the Azure Pricing Calculator. Fenster demonstrates it directly: adding a virtual machine, a storage account, and an Azure SQL database, then switching between pay-as-you-go, one-year reserved, and three-year reserved pricing, and between production and dev/test rates.
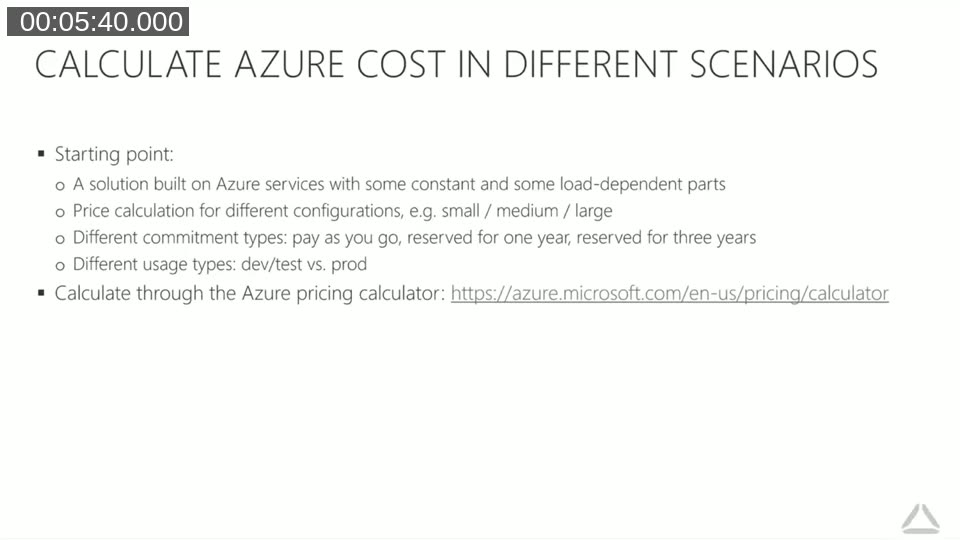
Each change means going back into the calculator and re-clicking through the configuration. With three configuration sizes, three commitment types, and two usage types, that is already 18 distinct calculations to click through by hand. Scale a solution up from three components to ten or twenty, and the manual approach stops being practical.
The Azure Retail Prices API
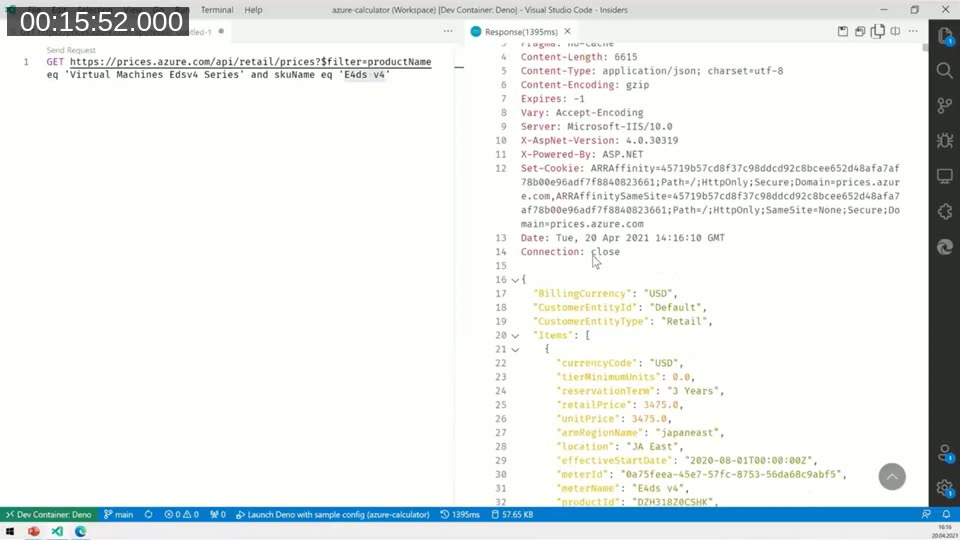
The first building block of the solution is the Azure Retail Prices API, an unauthenticated REST endpoint at https://prices.azure.com/api/retail/prices that returns current Azure pricing as JSON. No account or sign-in is required to call it.
Fenster queries it directly from VS Code using the REST Client extension (a Postman alternative that stays inside the editor), filtering for a specific VM series and SKU. A first request without a region or price type filter returns many results covering different reservation terms and consumption types. Adding armRegionName and priceType filters narrows the response down to a single price.
Docs: Azure Retail Prices REST API overview — the official reference for the endpoint, its filterable fields (armRegionName,serviceName,skuName,priceType, and more), and sample requests.
The API has a few quirks worth knowing before relying on it:
- Software license prices (for example Windows Server) only return results when
armRegionNameis left empty andpriceTypeis set toConsumption— licenses can’t be reserved. - Some product and meter names are inconsistent, so filtering with
startswithandtoloweris often needed to find the right meter (Fenster’s example: locating the static public IP meter). - The API now supports a
currencyCodeparameter for getting prices directly in currencies other than USD, removing the need to convert manually.
Fenster’s advice for exploring the API: start with a broad filter on a service name, inspect the results to learn how products and SKUs are named, then narrow the filter down to the exact meter you need.
A command line tool to automate the queries
Rather than firing off API calls by hand for every combination, Fenster built a small tool that reads a JSON configuration file, calls the Retail Prices API for each resource and pricing combination, and writes the calculated results back out as JSON. The source is on GitHub.
Source code: cosmoconsult/azure-calculator — the sample tool and configuration shown in this webinar.
The tool is written in TypeScript and runs on Deno, the JavaScript/TypeScript runtime created by Ryan Dahl (also the original creator of Node.js). Fenster picked Deno for its single-binary distribution and built-in package handling, which avoids the sprawling node_modules folder that comes with npm-based Node.js projects.
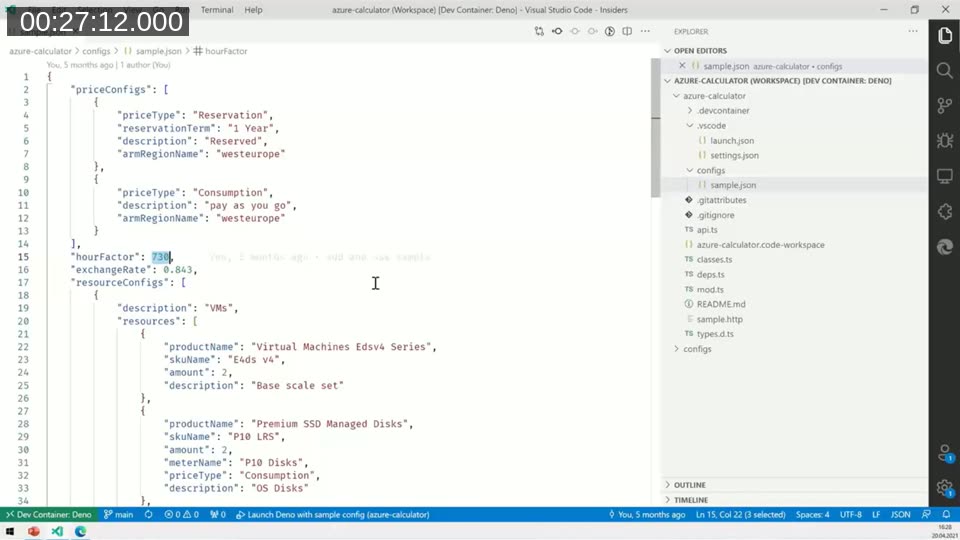
A configuration file defines the inputs:
- Price configs — the commitment scenarios to calculate, such as a one-year reservation in West Europe or pay-as-you-go consumption in the same region.
- Hour factor — the number of hours to use for hourly-billed resources (730, a standard month, by default).
- Exchange rate — used to convert results to a target currency (less necessary now that the API supports a
currencyCodeparameter directly). - Resource configs — the actual resources to price, such as virtual machines, managed disks, and licenses, each with a product name, SKU, and quantity, and an optional flag to mark parts of the configuration as optional.
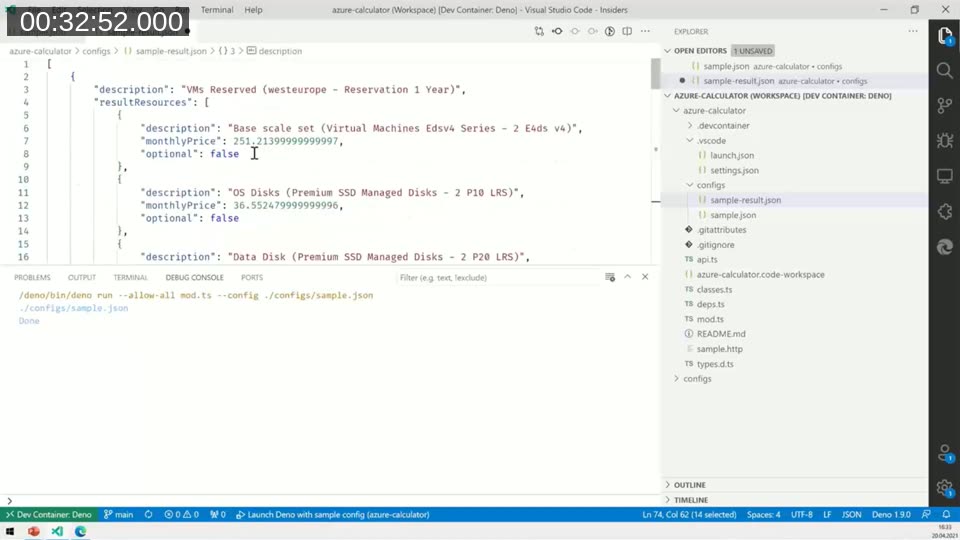
Running the tool (with F5 in VS Code) reads the configuration, iterates over every resource and pricing combination, calls the Retail Prices API for each, and applies the per-month math: dividing one-year reservation prices by 12, three-year reservation prices by 36, and multiplying hourly prices by the configured hour factor. The output is a result JSON file with a monthly price per resource, plus totals with and without the optional parts.
Analyzing the results in Excel with Power Query
JSON output is useful for automation but not for eyeballing numbers or running further calculations, so the next step brings the result file into Excel using Data > Get Data > From File > From JSON, Excel’s built-in Power Query import. Fenster then builds two separate transformations from the same source query: one that expands only the top-level totals for a quick overview, and a second, referenced query that expands the nested resource list to show a line-by-line breakdown with descriptions and monthly prices for every resource, per pricing configuration.
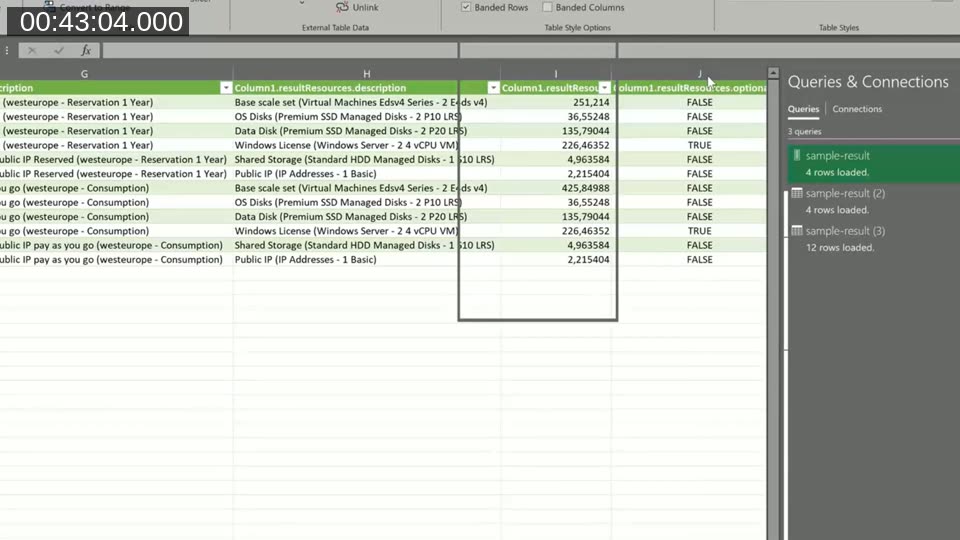
Because the Excel query is linked to the result file rather than pasted-in data, swapping in a different configuration (for example, a smaller VM size) and re-running the tool just requires pointing the query at the new result file and refreshing — the whole analysis updates without rebuilding it. For a full side-by-side comparison across several sizes, Fenster’s approach is to duplicate the Excel file per configuration and combine the totals in a summary workbook; a database or Power BI would be reasonable alternatives for larger sets of scenarios.
Running the tool in a dev container
The closing part of the session covers packaging the whole toolchain into a VS Code dev container, so a new developer can get a working environment without installing Deno or any of its dependencies locally.
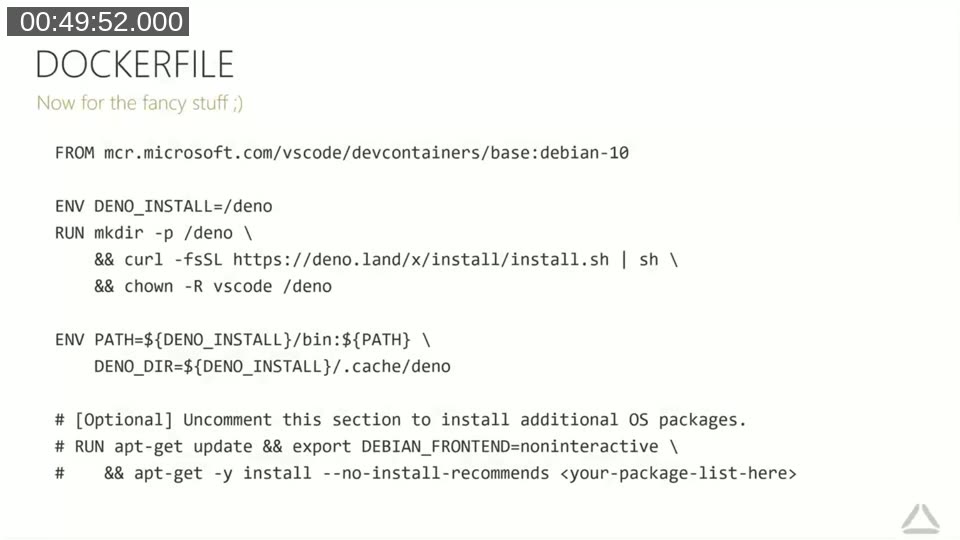
Two files define the setup:
devcontainer.json— names the container, points to the Dockerfile, sets the default shell, lists VS Code extensions to install automatically (the Deno extension, GitLens, and the REST Client), and mounts a local folder into the container.Dockerfile— based on a Microsoft-provided Debian image for VS Code dev containers, it installs the Deno binary and leaves room to add further OS packages if needed.
Docs: Developing inside a Container — the official VS Code documentation for the Dev Containers extension used throughout this demo.
Dev containers currently only support Linux-based tooling, which is why Fenster notes this approach isn’t yet an option for Business Central development itself. On Windows 10, the Windows Subsystem for Linux (WSL2) provides good enough support to run the container without a separate Linux machine. Native Windows container support in VS Code remains an open, unscheduled item.
Reference: Support Windows Containers · Issue #445 · microsoft/vscode-remote-release — the tracking issue referenced in the slide on why dev containers are Linux-only for now.
With Docker running in Linux mode and the repository cloned, opening the folder in VS Code and reopening it in the container installs every prerequisite automatically, giving a new contributor the exact same environment Fenster used in the demo, without any manual setup steps.
This post was drafted with AI assistance based on the webinar transcript and video content.